

ACC - The Definitive Custom Livery Guide
In this guide i will explain how to create a custom livery for any car in Assetto Corsa Competizione.
I will use Adobe Photoshop in all examples, you can do this with Gimp (free) but I'm not going to cover Gimp specifics.

Introduction
This guide is written so that basically anyone could follow it, it's very detailed and basic even though the process of creating liveries is fairly advanced, at-least for a normal user. Hopefully, this guide will give you the tools and understanding you need, so that you can get creative and create your own liveries. There will possibly be a part two in the future with some more advanced concepts.
I will cover different methods of working with liveries so that you hopefully at the end of the guide will get a good understanding of how to approach livery creation by yourself.
Since the 1.8 update of ACC, custom liveries are fixed compared to previous version that caused a lag-spike when a driver joined a server with a custom livery.
The big change is that the game will now create .dds files from .png files.
What caused the issues in the previous versions of ACC was that each and every .png file had to be loaded by all clients.
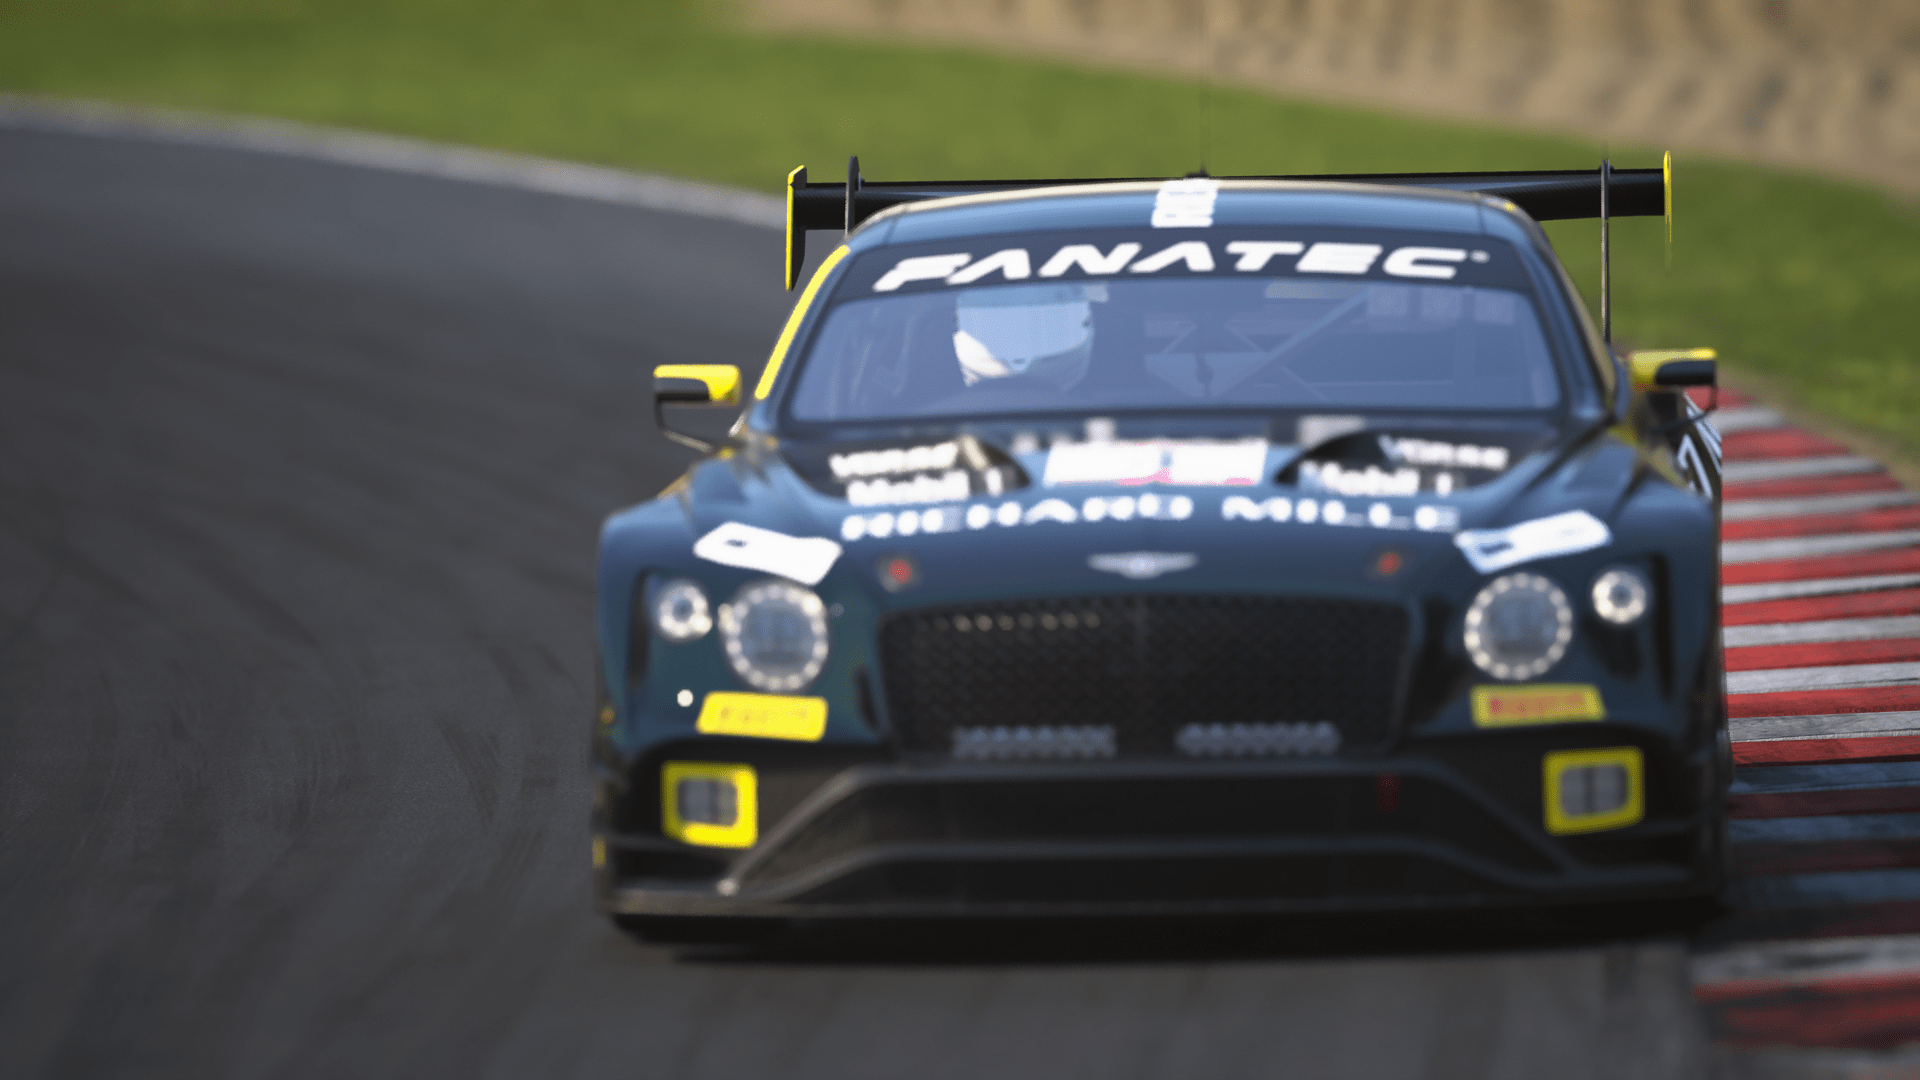
Table of Content
- Foreword
- Resources
- Getting Started: Part 1
- Editing menuSettings.json
- Getting Started: Part 2
- Identifying Car Parts
- Getting comfortable with your tools
- Start Painting
- Applying paint on parts
- Adding a logo
- Summary
Foreword
Before getting into this guide, there is some things i could mention to make it easier for you.
Creating a livery takes time and effort, this requires patience, although if you are skilled in Photoshop, you will probably be able to fast-track this. Other drivers that does not have your custom livery, will not be able to see it.
This is a bummer, but it is how things work.
The best thing you could do, is to use the in-game livery editor to paint the car, then add sponsors and small part painting in Photoshop. When you do it like this, people online will see your coloring exactly as it is, but without your custom sponsors and custom paint. I think it's fair to say that this is a good tradeoff.
To get started with your own custom livery you will need some tools and resources. First of all, you need to have photo editor, in this guide i will use Adobe Photoshop, but Gimp will work as well, although i will not go into Gimp specifics.
If you don't have Photoshop, you could get a free trial for 7 days here.
Resources
You will need some resources before you begin creating your own custom liveries. I have made a resource package that contains everything you need to get started and much more.
What is included in the pack?
- GT3 UV Maps/Photoshop Template (Wireframes) (Source)
- GT4 UV Maps/Photoshop Template (Wireframes) (Source)
- GT3 3D Templates (Source)
- GT4 3D Templates (Source)
- 2020 Fanatec Rebellion-AWS Number Panels (Source)
- 2021 GT4 European Championship Number Panels (Source)
- SRO Country Flags (Source)
- Paint Values (Json files) (Source)
- General UV Map for finding different parts of the cars (Source)
Feel free to download whatever you need directly from the sources mentioned above, or you could download the entire pack here.
Sha256: 4A5971B8F128139CFF7931686D9088A746D4ABECCEE5F1F7D81F491FCEFD48C5
LynxSec - ACC Livery Guide Resource Pack V0.3.rar
The pack is archived and password protected.
Once unpacked, the size of the package is 2.24gb.
The password for the pack is: $2y!28L@3&98
You don't necessarily need everything listed here to create a livery, it is rather a complete list of resources that i found myself using during my livery adventures.
Getting Started: Part 1
So, before we get into Photoshop part, we need to enter the game.
In the game, you need to pick the car and create a new livery.
Enter a Car number and a Team name.
For this guide, i have picked the Bentley Continental GT3 2018.
Now as i stated before, instead of painting the entire livery in Photoshop, we will paint the car with the in-game livery editor.
You can decide by yourself if you want to do it like this or if you want to paint the entire car in Photoshop.
Mainly i do it like this because i want other drivers online to see the paint-job online, without having the custom livery.
What they will not see is the sponsors and anything else that we will add in Photoshop, like small parts painting or custom sponsors.
 When we got the paint-job done, we save it and exit the game.
Now we need to enter the Documents folder and find the livery we created.
The file that you are looking for now is located at
C:\Users\User\Documents\Assetto Corsa Competizione\Customs\Cars
Now, sort the files by "Date Modified", open the last edited file, this should be your new livery that you just created in-game.
The file looks something like this:
{
"carGuid": 0,
"teamGuid": 0,
"raceNumber": 1,
"raceNumberPadding": 0,
"auxLightKey": 0,
"auxLightColor": 177,
"skinTemplateKey": 105,
"skinColor1Id": 527,
"skinColor2Id": 527,
"skinColor3Id": 177,
"sponsorId": 0,
"skinMaterialType1": 5,
"skinMaterialType2": 5,
"skinMaterialType3": 0,
"rimColor1Id": 1,
"rimColor2Id": 177,
"rimMaterialType1": 2,
"rimMaterialType2": 1,
"teamName": "LynxSec Guide",
"nationality": 30,
"displayName": "",
"competitorName": "",
"competitorNationality": 30,
"teamTemplateKey": 0,
"carModelType": 8,
"cupCategory": 0,
"licenseType": 0,
"useEnduranceKit": 1,
"customSkinName": "",
"bannerTemplateKey": 0
}
Now, this is a json file, it's important that you don't break the json format and that you don't save it with another extension other then json.
Rename this json file to whatever you want, so you can find it easier in case you need to change anything in it.
I renamed the file used for this example to "lynxsec_guide.json".
Let's move on, now we need to link the livery json file, to a folder that will contain our custom livery files.
Find this row:
"customSkinName": "",
Now we need to add a name. Make sure not to include any spaces in this name.
In this example, i will use "lynxsec_guide". It should look something like this.
"customSkinName": "lynxsec_guide",
Now we want to copy this file to a new folder that we are going to create. (don't copy the text and create a new file)
First go to this location
C:\Users\User\Documents\Assetto Corsa Competizione\Customs\Liveries\
In the Liveries folder, create a new folder called the same thing as what you put into "customSkinName", in this example, we called it "lynxsec_guide".
C:\Users\User\Documents\Assetto Corsa Competizione\Customs\Liveries\lynxsec_guide
Now we want to paste the livery json file that we edited into this folder we just created.
When you are done copying, you could clear the contents of the copied file that you just pasted into Customs\Liveries\
When you have an empty copy of the file, rename it to decals and save it.
It should be named "decals.json".
Copy the file again and name it "sponsors", same as before the extension needs to be .json.
Both these files are now empty, we just copied the livery file to get the json file extension with ease.
A couple of steps earlier i noted that it's important to not break the json or to save it with another extension.
We need two files here, one for decals and one for sponsors, both of them needs to be .json files or this wont work.
That's why you needed to copy the livery file and clear it.
These files will just state what type of material your decals and sponsors will be, for example decals could be chrome and sponsors could be glossy. We will talk more about this later.
TIP: Create a folder and save a set of empty decals and sponsors files somewhere, so that you could just create a new folder and paste the two files in whenever you are starting a new livery. That is a much faster way to get started, however this that we are doing here is mostly so that you understand what you are doing.
Editing menuSettings.json
We need to edit another config file that belongs to the game, it's called menuSettings.json.
Before the 1.8 update, you could simply drop a .png file in the custom livery folder (that we just created) and then click on the Livery button in-game to update the Livery. However, this wont work anymore since the game creates a .dds file from the .png that we will produce with Photoshop.
But, there is a parameter in menuSettings.json that disables the game from creating the .dds files, so that you can preview your Livery changes like before.
Go to
C:\Users\User\Documents\Assetto Corsa Competizione\Config
Now open up menuSettings.json in your favourite editor (notepad is fine, but why not do it right from the beginning and use Sublime Text 4)
Now in this file, you need to search for "texDDS", bring up the search function by pressing CTRL + F.
},
"texCap": 1,
"texDDS": 1,
"texMips": 1,
"customGraphicOptions":
{
If you set texDDS to 0, the game will not generate .dds files and you can preview your custom liveries directly in the showroom.
If you set texDDS to 1, the game will generate a .dds file from any .png that you will drop in the custom livery folder, so you have to remove the old .dds files every time you want to update your livery in-game
My tip here is that you set this to 0 when you work with liveries and put it back to 1 when you are done, this could be hard to remember, but you will get used to it.
An easy workflow method would be something along these lines:
- Open up menuSettings.json in your text editor
- Change the texDDS to 0
- CTRL + S to save the file with the new value
- Dont close your text editor, leave the menuSettings.json open
- Start the game (Important that you start the game AFTER you change anything in menuSettings.json)
- Start working your livery
- When you are finished working your livery, go back to your text editor with the file still open in it
- Change texDDS back to 1
- CTRL + S to save the file
- Close the game
Done
Getting Started: Part 2
Great, you have come this far!
We have a livery setup in-game, we have the folders and files setup, now it's time to get into Photoshop.
For this tutorial I'm using Adobe Photoshop Version: 22.4.1, so the UI may differ if you have a different version.
Have in mind that i am not a professional at using Photoshop, i have merely used it to and from for years, there is probably things that could be done easier or better, that i have yet to learned or discovered.
Packing up the resource pack
If you downloaded the pack mentioned before part 1, you need to pack it up with the password provided.
Move the pack to wherever you want to store it.
Right click the pack and pick "Extract Here"
Now we need to enter the password for the archive.
When it's packed up, it should look something like this. 
Now, we will primarily work with the GT3 car templates for this guide, it's a good idea to make a copy of the file that we want to use, so that we don't use the template.
Go into the GT3 car templates folder and pick the car you want to start working on.
Copy the folder.
Go back one folder and create a workfolder, it's much nicer to have a tidy folder structure when you are doing stuff like this.
Create a workfolder that has the same name as the custom livery that you are creating. I named mine "lynxsec_guide_workfolder"
Paste the car template folder that you copied before into your workfolder.
Now enter the folder, you will see two files.
What you see is the wiremesh and Photoshop project template.
Starting up Photoshop
Now it's time to get into Photoshop, let's open the template file.
Double-click the Photoshop Template file and Photoshop will start.
Now what you see will look something similar to this
Now this is personal preference, i really don't like the white layer, so i usually disable that when working with these templates.
Now it should look something like this.
Identifying Car Parts [OPTIONAL]
This is very interesting, how do you know what part is where on the actual car? Well, you don't.
That's why i have included a 4K UV Map, so that you could try to find whatever you are looking for with ease.
You can find the UV Map that we are going to use in the unpacked folder. 
Drag and drop this file into the Photoshop project. 
Now things are getting interesting, this .png picture will make it much easier for you to find what part you are looking for on the UV mesh.
It should look something like this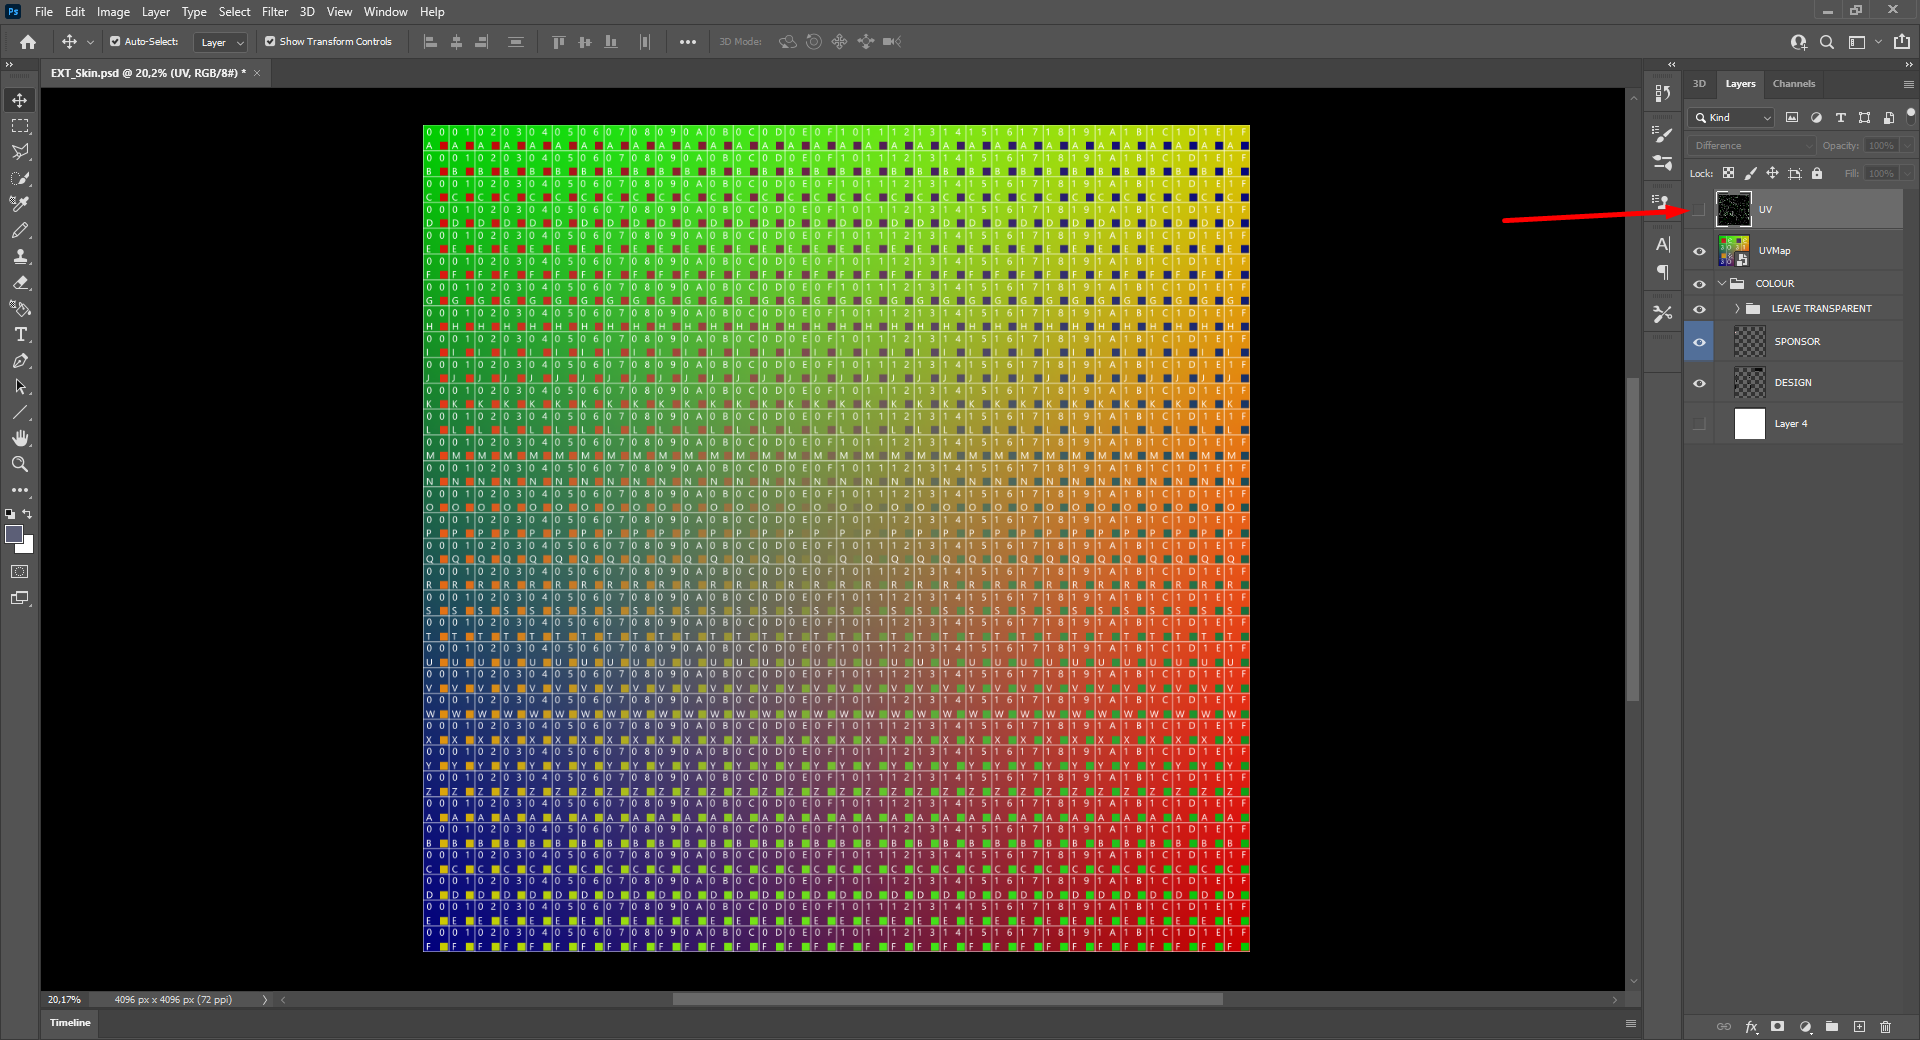
Disable the black UV mesh layer and position the UV-Map layer under it.
Now we need to export this as a .png into the custom livery folder that we created before.
Pick the custom livery folder you created before and name the file that we are exporting to decals
Press save and start up the game, pick your car and your team that you created.
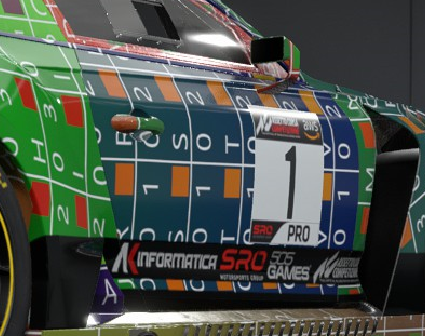
Now this is where things get funky!_0.jpg)
_0.jpg)
When the car is skinned with this UV map, you could easily find what part belongs where on the UV Mesh.
For example, we can see that the right door is cyan blue with orange squares. Now we need to look for that in the Photoshop Project.
First off, let's enable the UV mesh and set the blending on the UV map, so that it will be easier to look at.
So, enable the UV Layer again and right click the UV-Map layer, pick "Blending Options"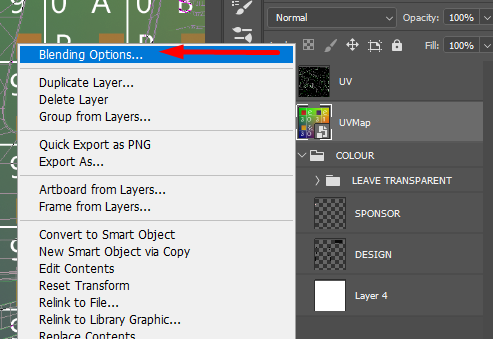
Set the blending Opacity to 65%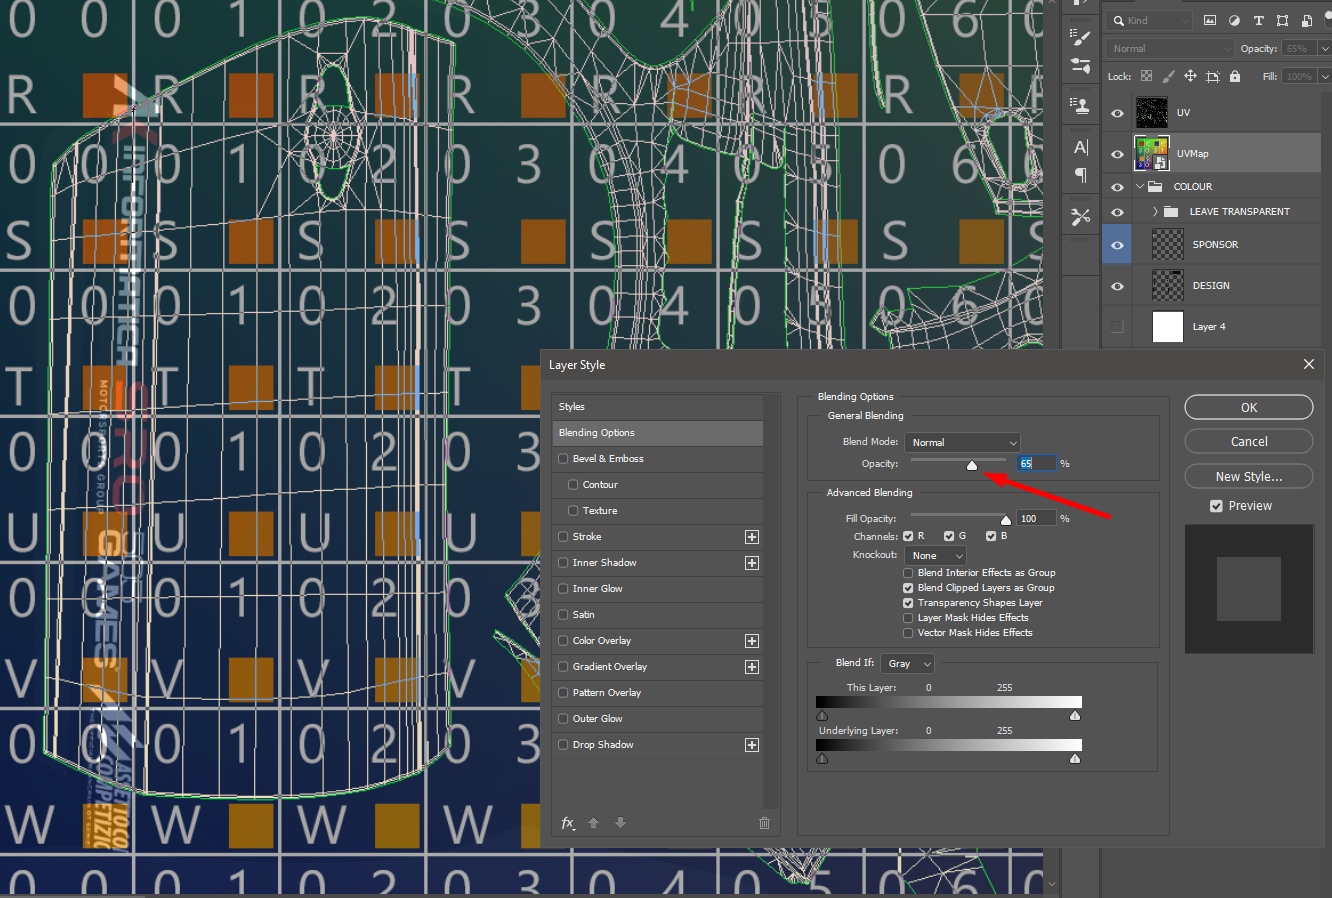
Now we can easily see what part of the UV Mesh is actually the right door on the car. 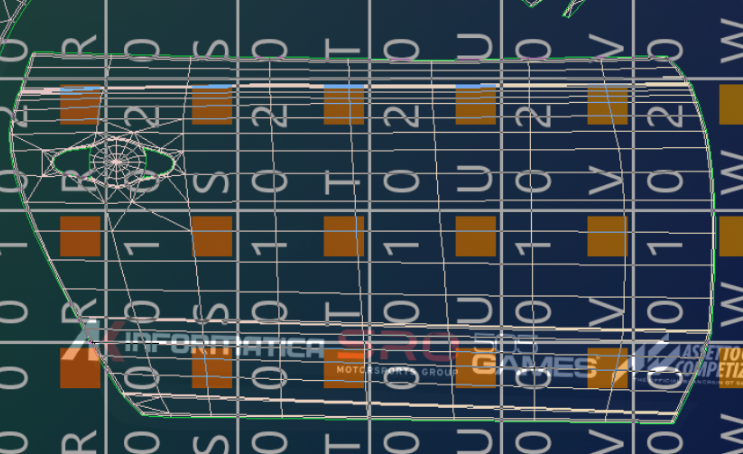
Now you should have the tools you need to find any part on your car!
Getting comfortable with your tools
Now we are finally here, it's time to get started working on the livery.
Before we get into it, i will make a list of short commands that will make your life easier.
- Scroll = Move view vertically
- CTRL + Scoll = Move view horizontally
- ALT + Scroll = Zoom in/out
When you are working with projects like this, you don't want to put everything that you want to add or paint in the same layer. So the first thing we want to do now, is to create the layers we want and learn how to use them properly.
We are going to create two layer groups, one called Sponsors and one called Paint, you can call them what you want, and you don't have to follow my standard if you already know what you are doing at this point.
Create Layer
Go up to the menu row and pick "Layer" - "New" - "Layer"
Here i like to create one layer per color, if i want to do some paint.
Do the same again and create all colors you want to paint, you can create layers as you go, so you can start off with just one coloring layer.
Creating Layer Group
Go up to the menu row and pick "Layer" - "New" - "Group"
Name the first group: Paint
Do the same again and create a group called: Sponsors
Sorting layers is really important, if coloring layers are on top of the sponsors layer, the sponsors layer will disappear.
You wouldn't want to put a sticker on a real car and paint over it, would you?
Here is an example of how i sorted the layers for this guide.
Explanation of the layers
UV - The UV Mesh with the green and white lines, put this at the top and lock it. When you lock this layer, you will not be able to move it out of place or edit it. That's exactly how we want it.
UVMap - The 4k UV-Map we used to identify parts, disable this when you are done with identifying parts.
Sponsors layer group - In this layer group we put our logos, you can see that the included "SPONSORS" logos are moved in there.
Paint layer group - In this layer group we can create new layers to paint on, i prefer to create one layer per color, so that i can easily track back and make changes or correct errors.
White Color - Layer for White coloring
Yellow Color - Layer for Yellow coloring
The rest of the files are included in the Photoshop project file, you can use them, or you can disable the layers, it's completely up to you. SPONSORS is the default sponsors from the game, DESIGN is some coloring and Windows Frame is the paint on the cars window frame.
Start Painting
Finally the fun part, let's start painting!
In this part i will show some simplified examples of how to paint various parts of the car.
This should give you an idea of how to get creative by yourself.
This is the part i will begin with 
I want to color this part White, so i begin with selecting the White Color layer.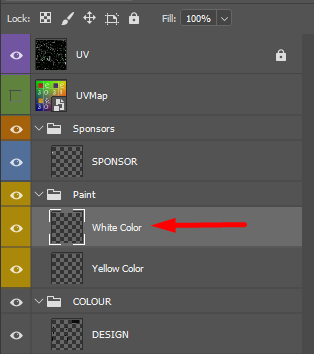
When the correct layer is selected, you have to pick the pencil tool, and pick a color.
The Pencil tool is available on a Hotkey, that hotkey is B.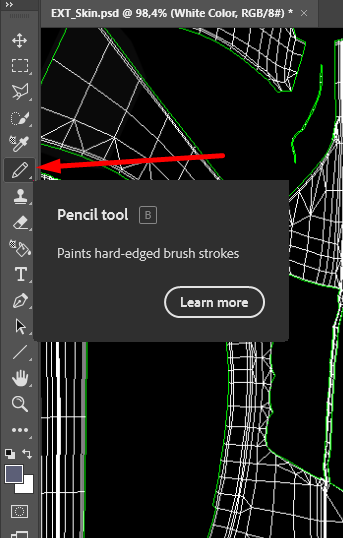
The color picker is pretty straight forward. Just pick a color and press OK.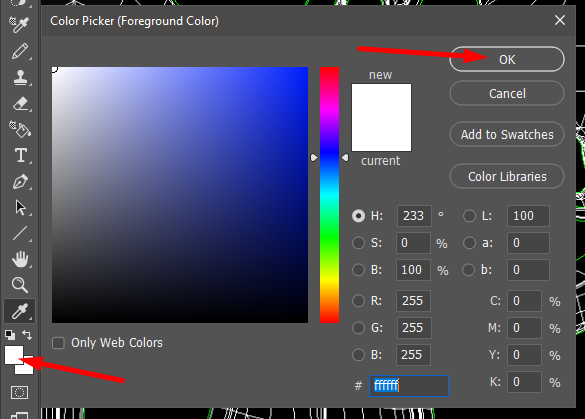
Now set the pen/brush size to an appropriate size for the part that you are painting. 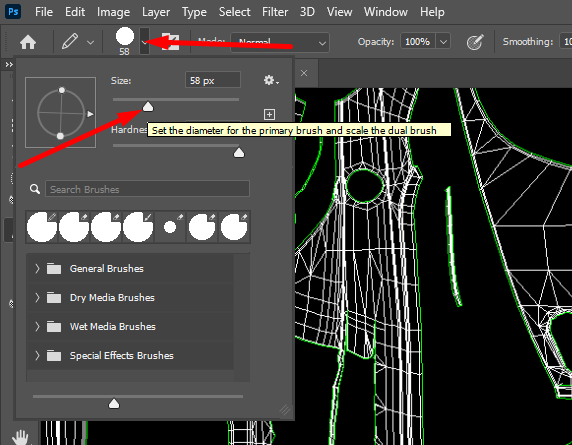
Applying paint on parts
When painting parts, you want to make sure to cover the entire mesh, it's okay to paint a little bit outside the mesh if there is nothing else there. If it's a tight space with a-lot of parts, you want to zoom in a bit and lower the pen/brush size so that you can apply paint more accurately.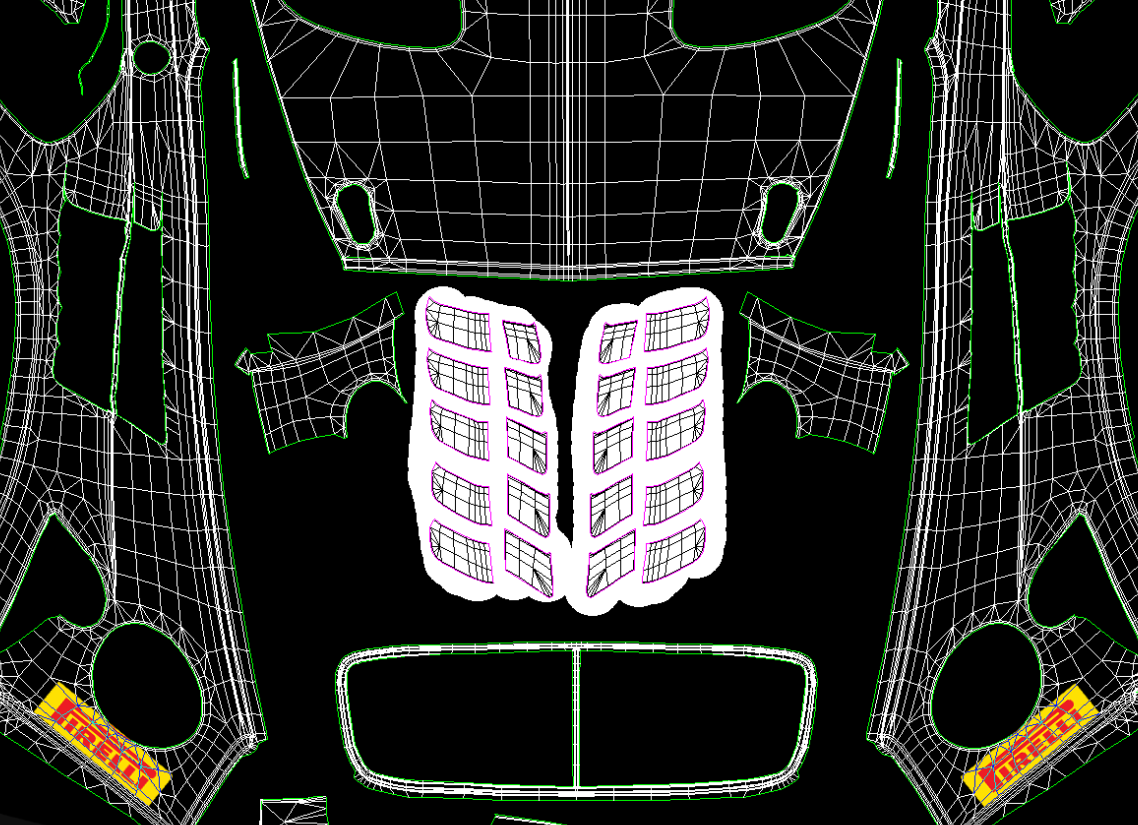
Now we got some paint applied, let's take a look at how it looks in-game.
Disable the UV mesh before you export the .png, otherwise the mesh will be visible on the car.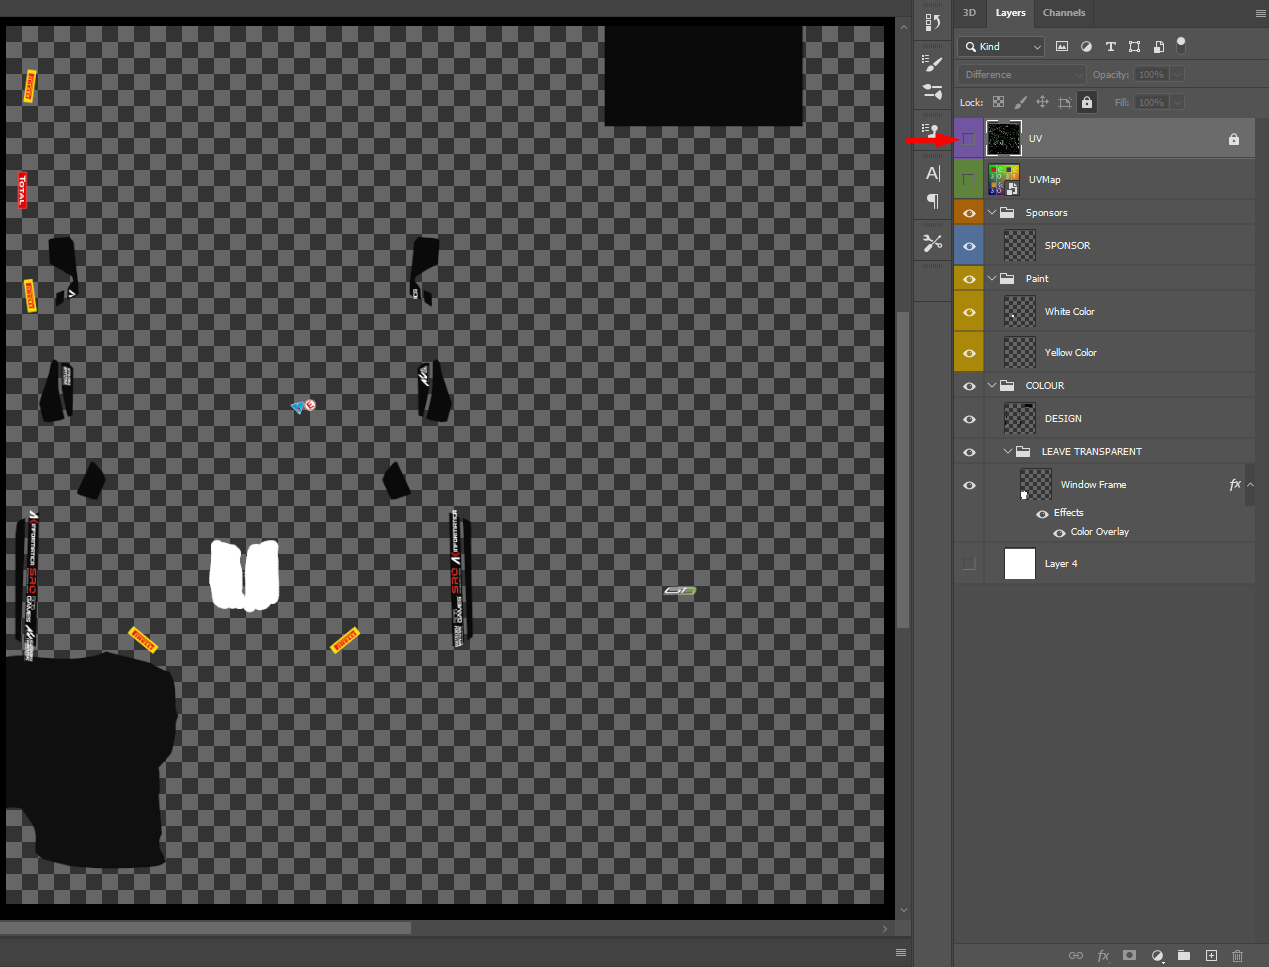
Now we can proceed and export this as a .png. 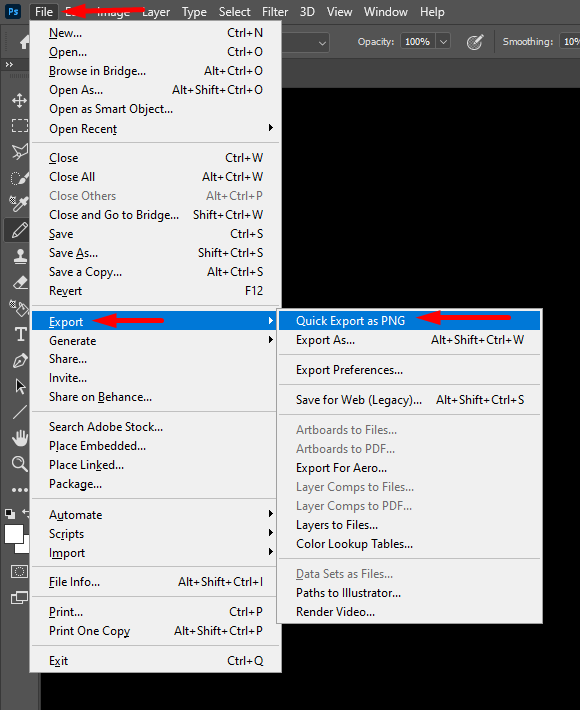
Make sure that it's saved to the correct folder, the one we created earlier for the custom livery.
The file should be saved as decals.png or sponsors.png. To keep them separate, later on we will export all sponsors and logos separately as sponsors.png.
For now, just export everything as decals.png since we are still not finished. 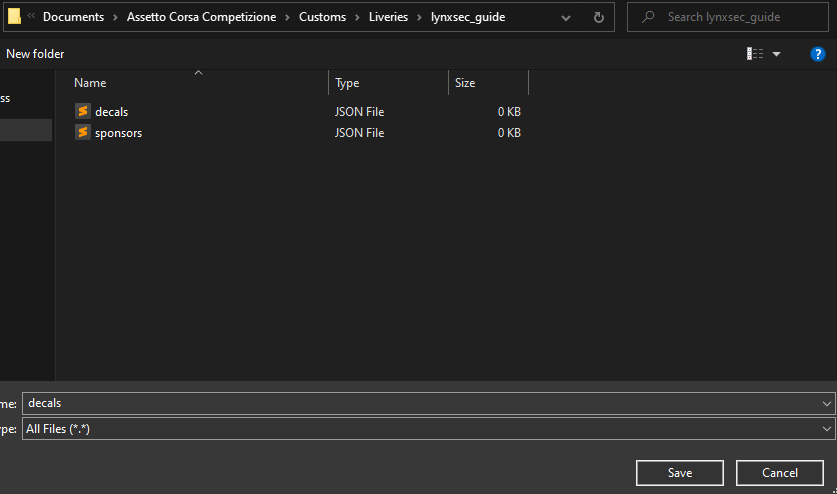
Now, go back into the game and click on the car number to refresh the Livery. 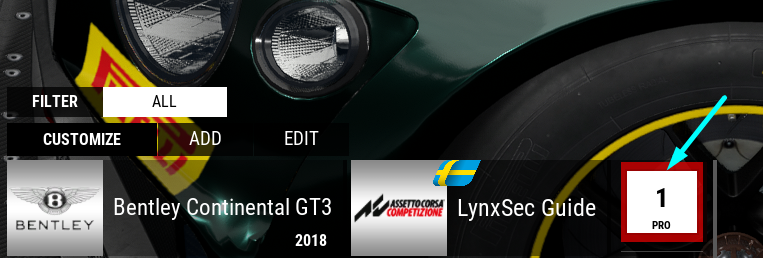
Now we should see the change we just did!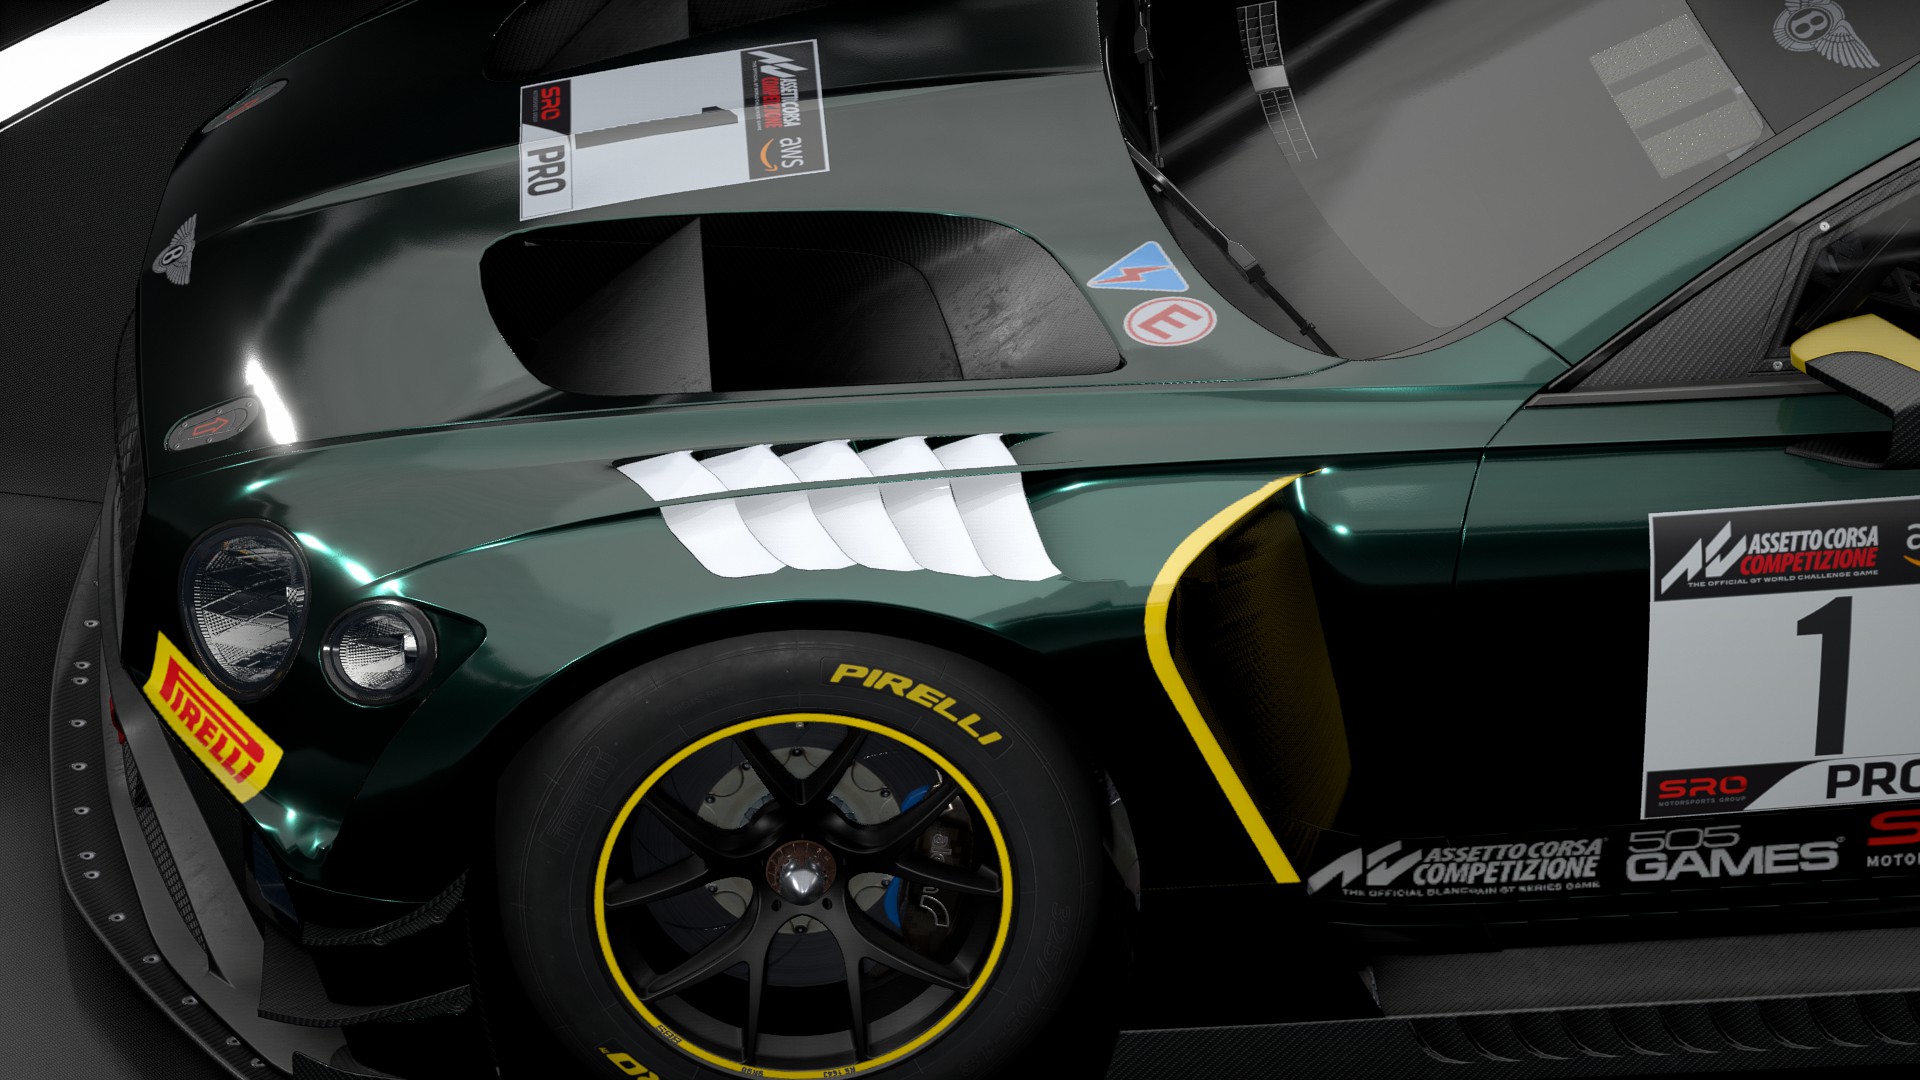
Great, you have come a far way, but we are only scraping the top of this mountain so far.
In the next section we will go over a sponsor example.
Adding a logo [BASIC]
In the next example, we will add a logo to the car.
This is not that much complicated compared to coloring, however there is a little bit more tinkering to get everything aligned correctly.
Start with downloading a couple of logos that you want to use, you want to download .png or .svg files, not .jpg or .jpeg as the latter is not transparent.
In this example i will add a Valve Index logo right above the front headlights. 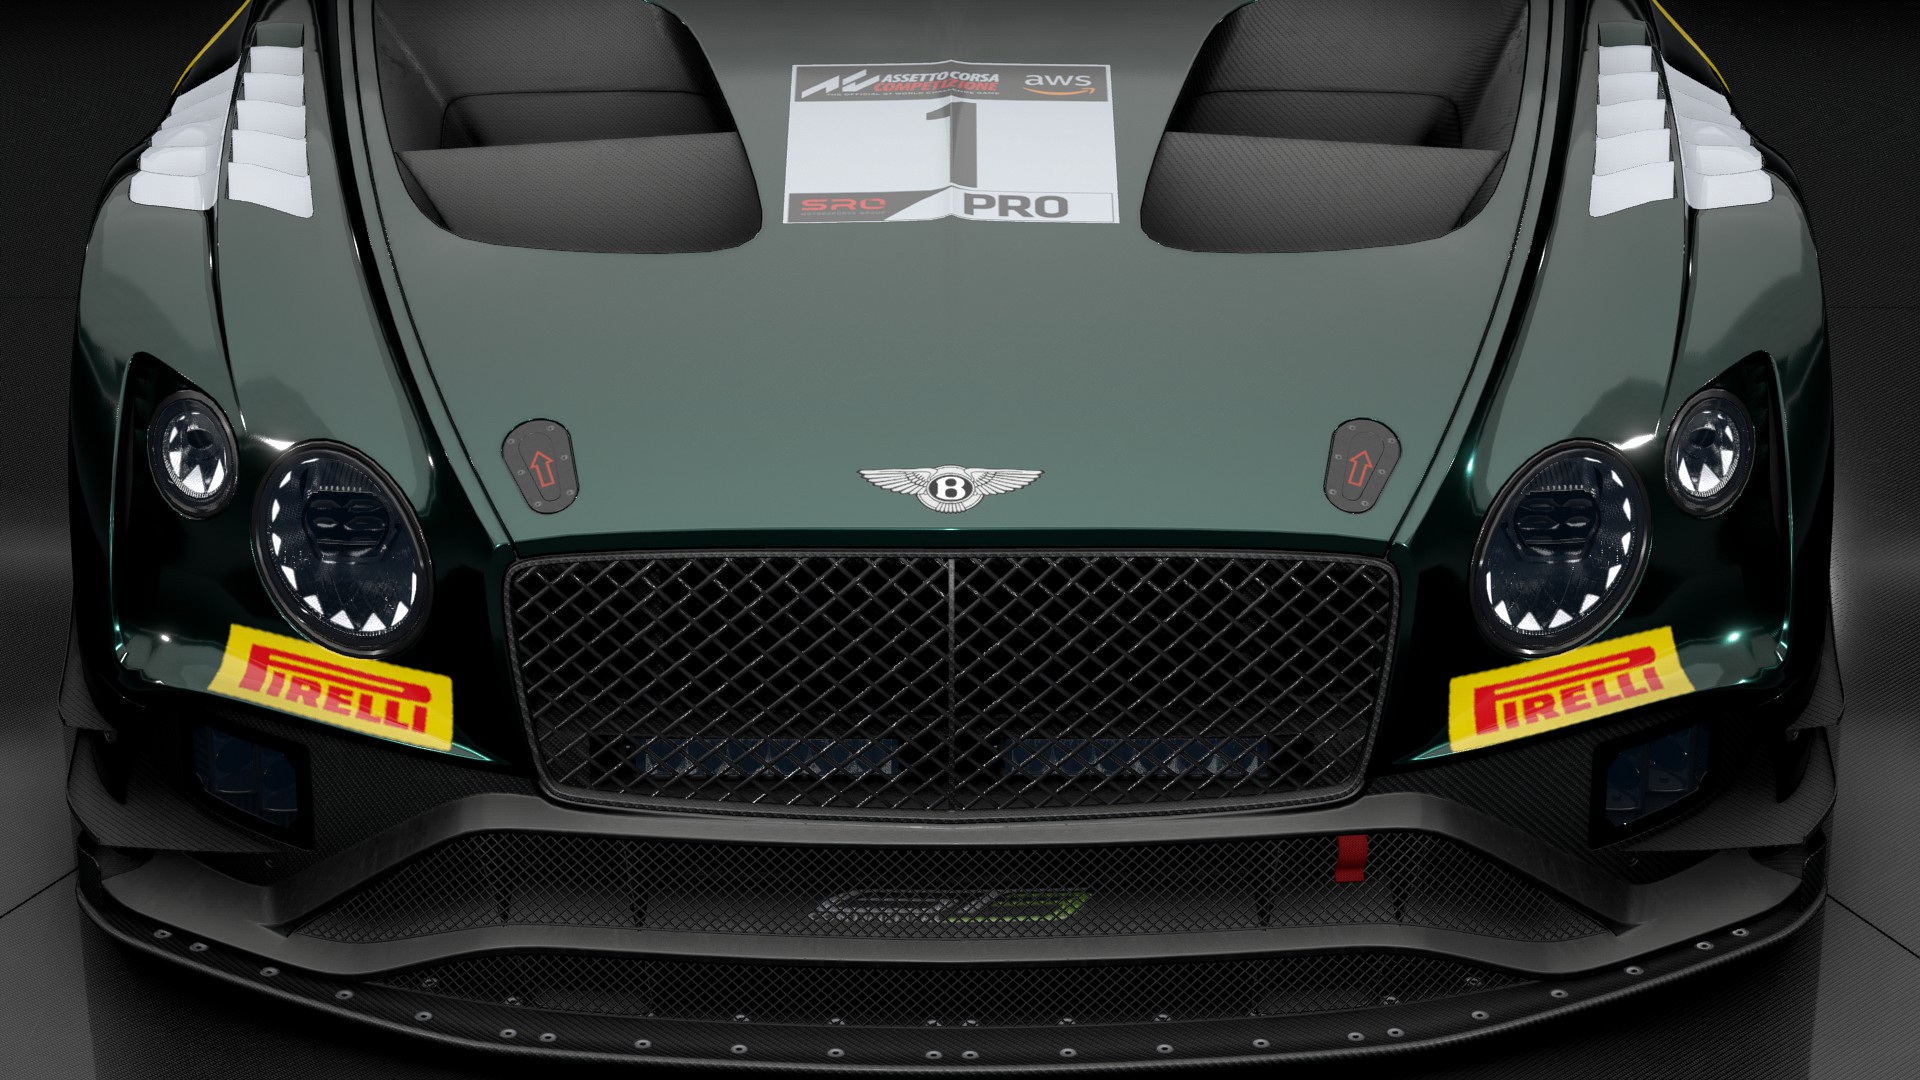
Let's begin by drag and dropping the logo into Photoshop. 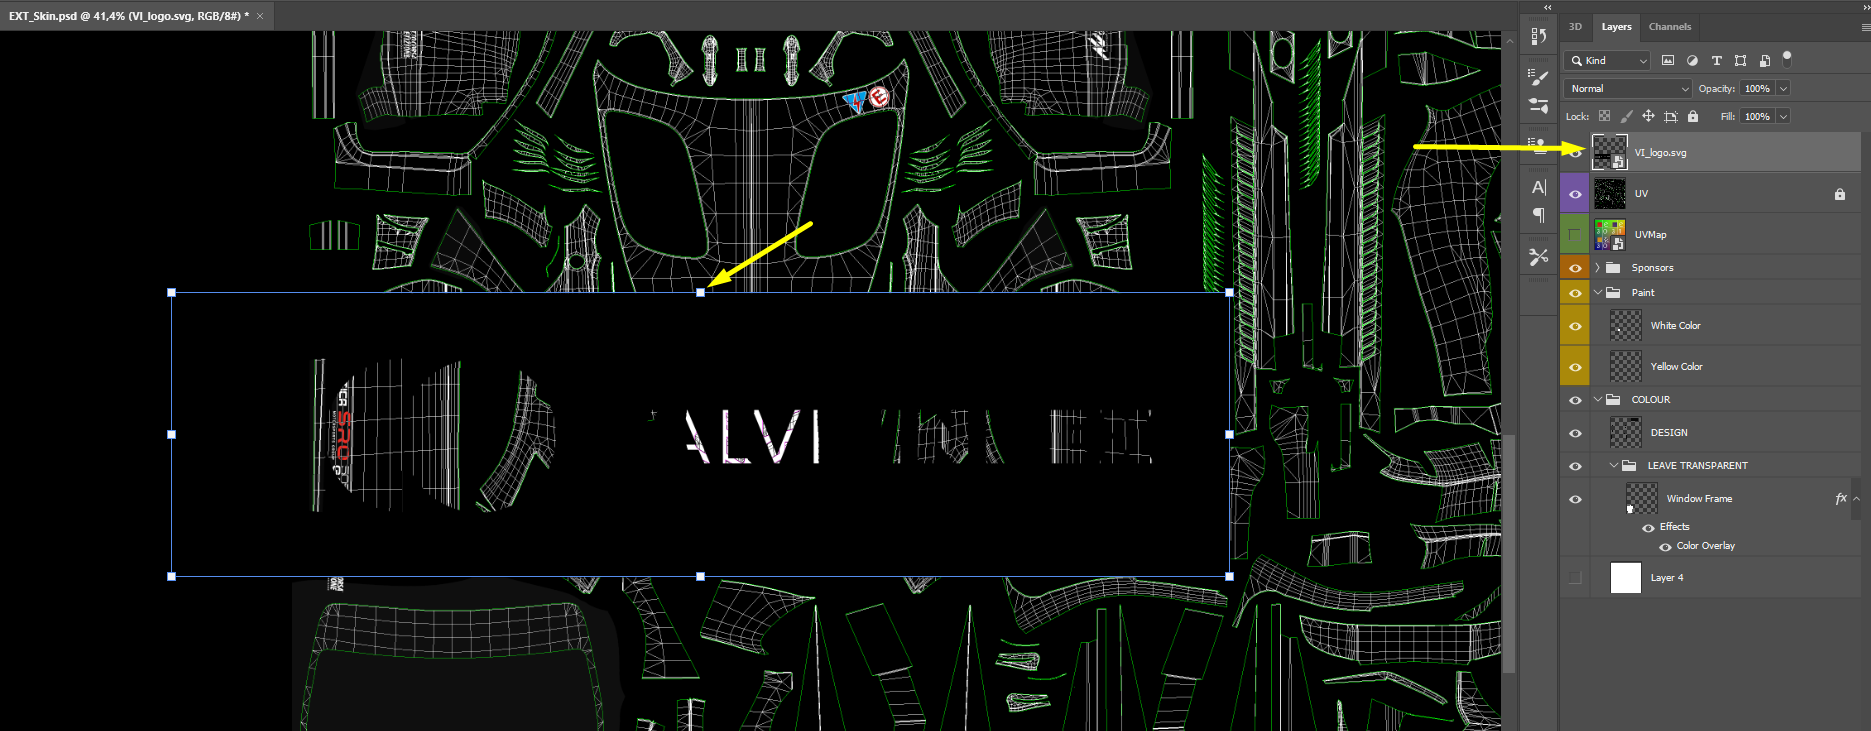
You can see that the logo is made into a layer, although the layer is on top of the mesh, we want to put it further down, i will put this logo into the Sponsors layer group.
After that i will scale it down to a smaller size so that it fit's the part i want to put it on.
And last, i will color the logo white since the car has a dark green color. (To do this,right click the layer, pick "Color Overlay" and pick the color you want)
When that is down and we have fitted the logo, we need to fine tune the placement. So far this is how it looks. 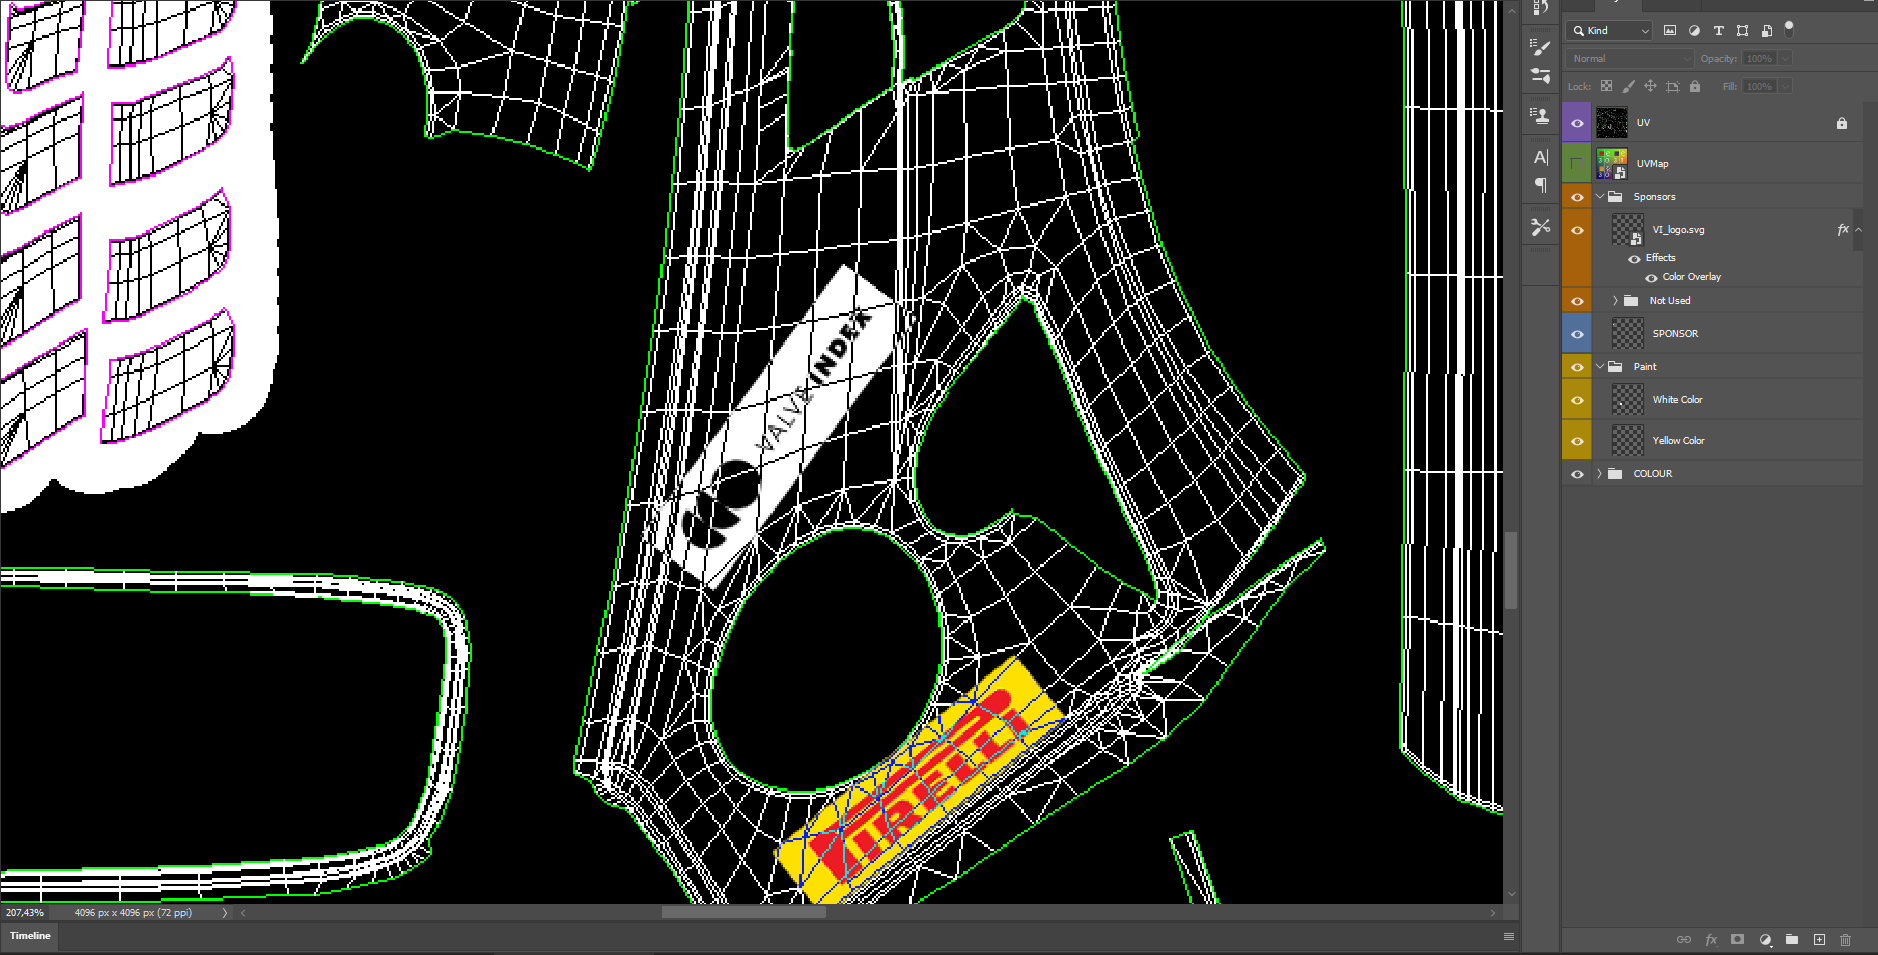
Tip: Note that i have created another layer group called "Not Used", i use this group to put stuff i don't use at the moment or things i don't want to delete yet in here.
Basic object manipulation
To fine tune the placement of logos and textures, you need to learn a little bit about the states of an object when selecting it.
Not selected, the object is placed. Click it once.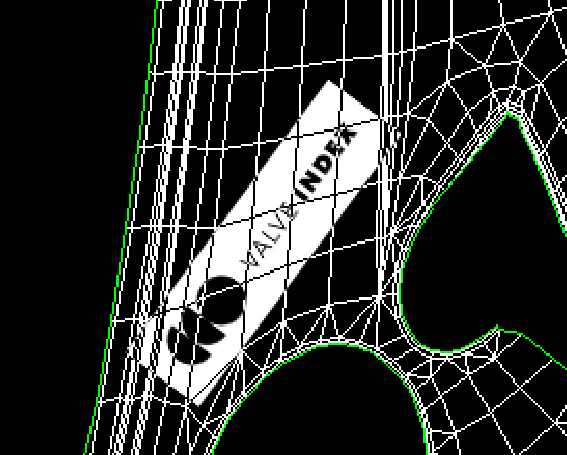
Now the object is selected, but still not able to manipulate it. Click one of the corners.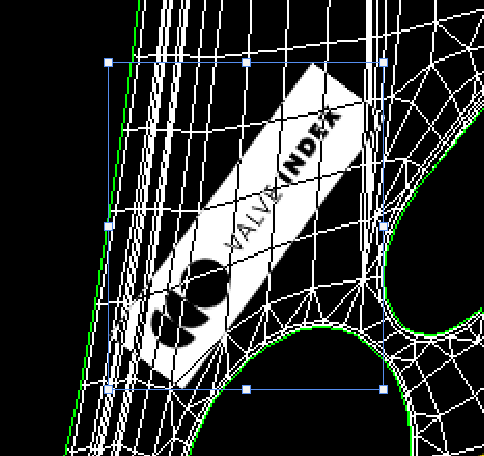
Now you can scale, rotate, scew, warp etc. So, to do this you will have to learn how to work these methods properly. It will take some time, but you will get it eventually.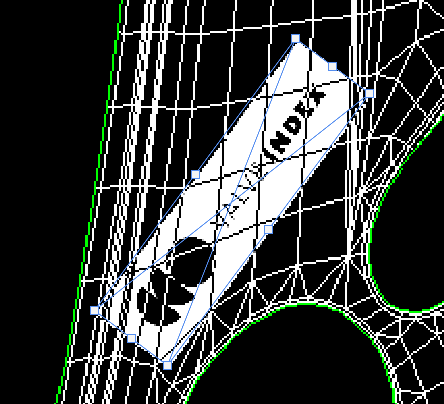
Now when i am happy with the alignment, i will copy the logo and paste it back into the canvas again.
Since we have only worked one side, this copy will be for the other side of the car. 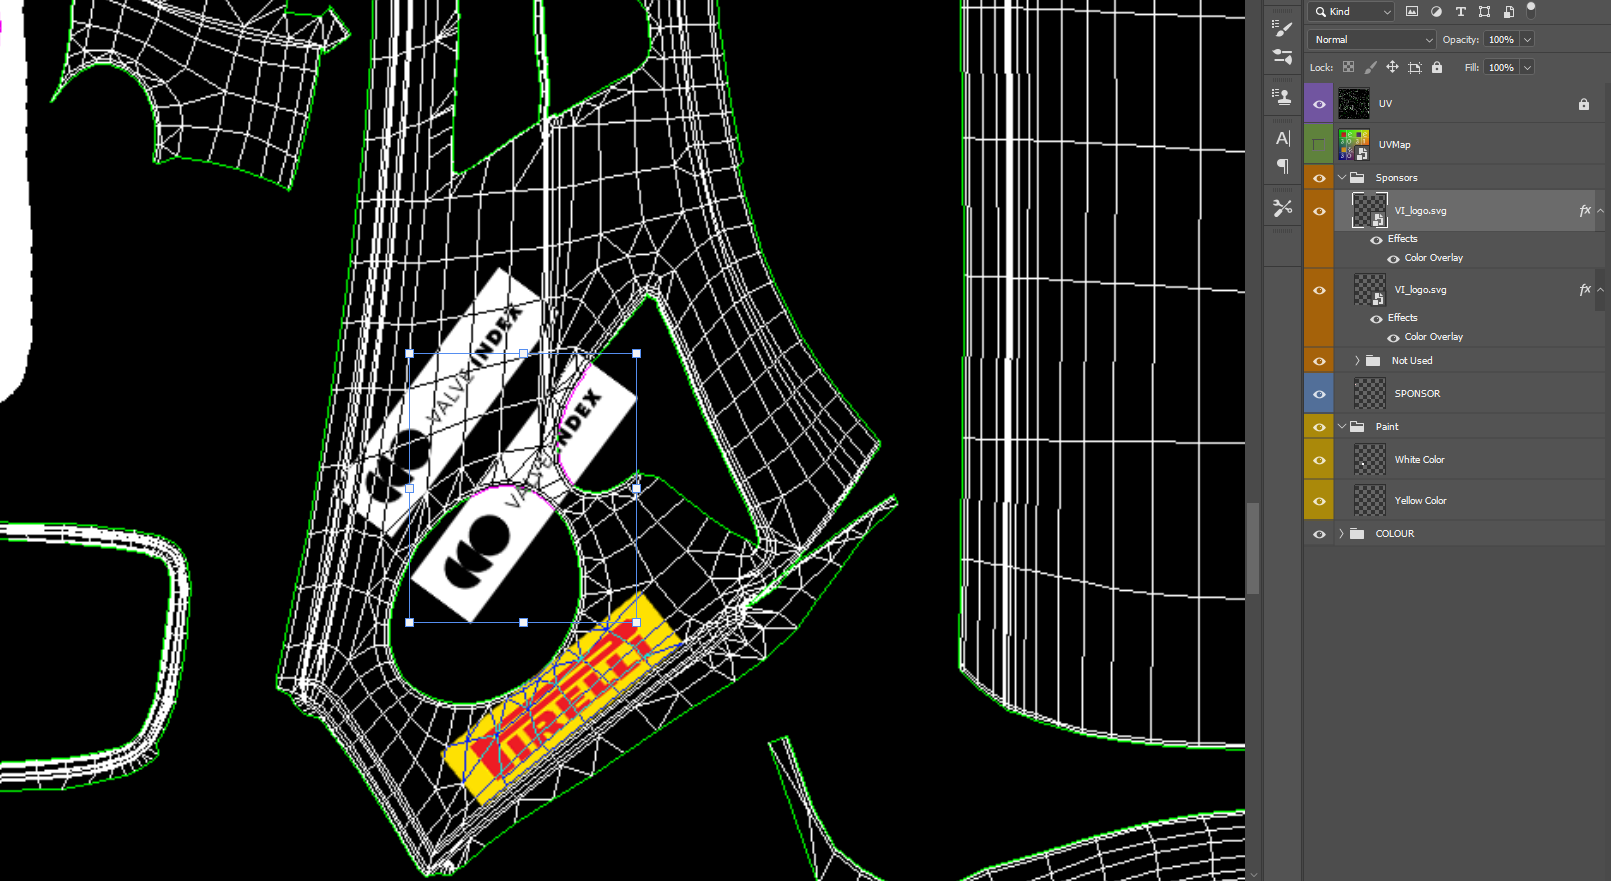
Go to "Edit" - "Transform" - "Rotate 90° Clockwise"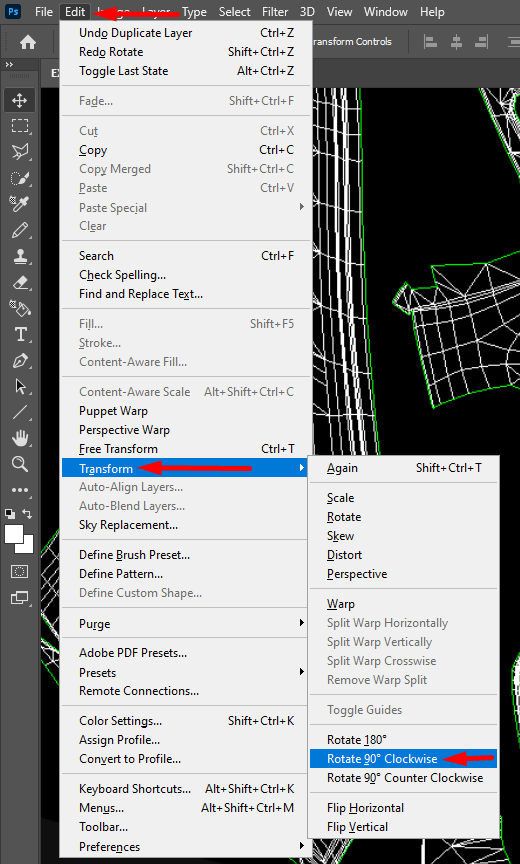
Now the logo is rotated so that we can align it on the opposite side of the car. 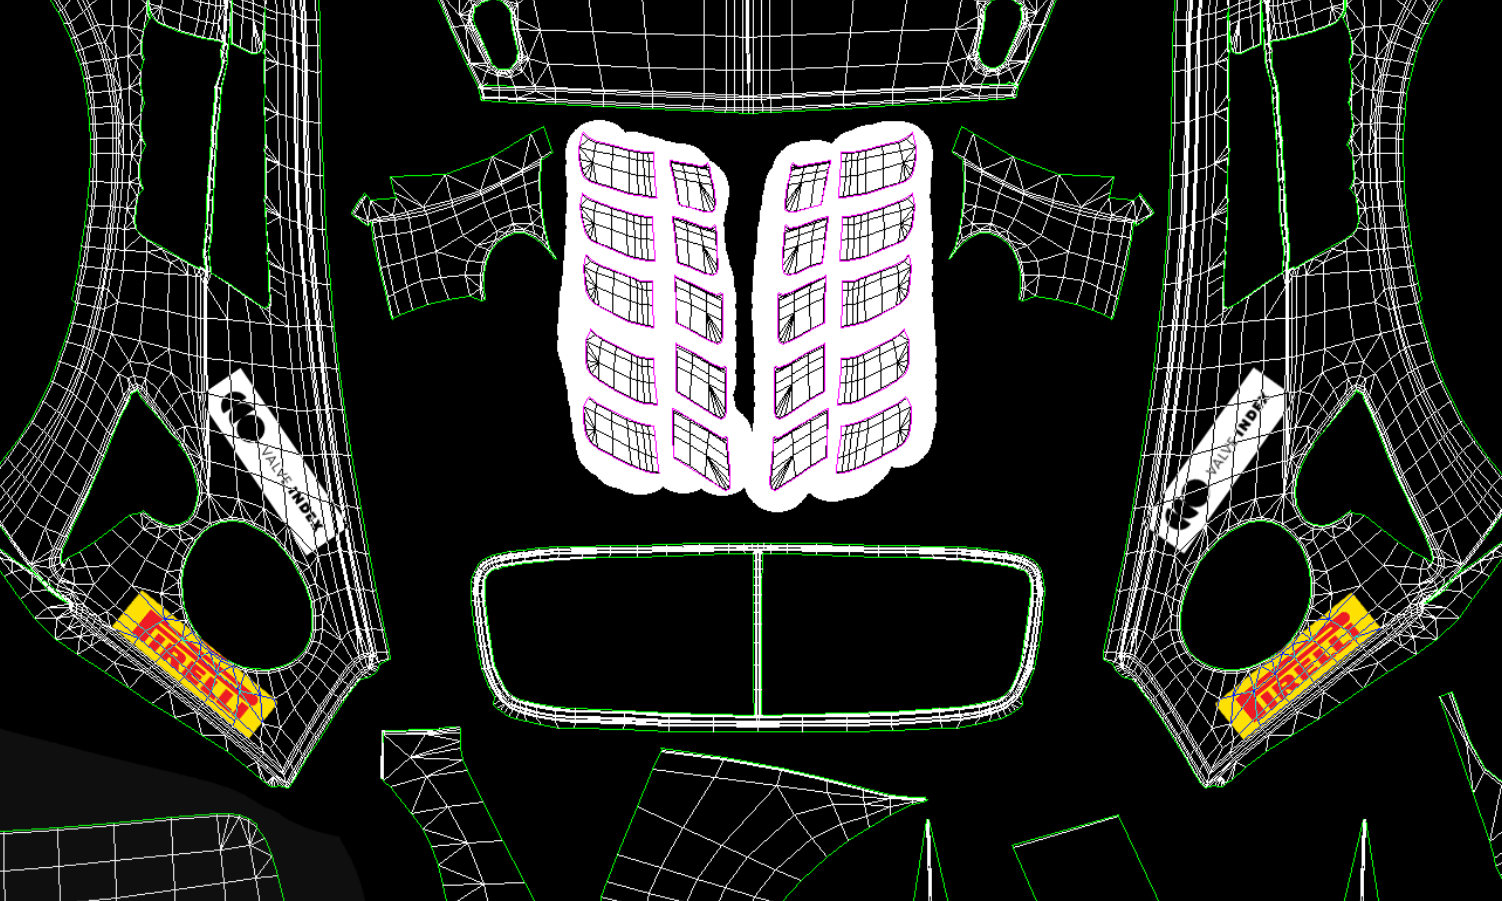
Let's export this and see how it looks. 
Looks pretty good, and it wasn't to hard to achieve.
Most of the logos that you want to put on the car will require some testing to align perfectly.
Summary
Now you should have a better understanding of how to create custom liveries and how you could get creative on your own.
If you still need to learn more, or prefer a video guide, i can recommend Boonatix on Youtube. You can find it here.
If you liked the guide and would like to thank me
Follow me on Youtube